Tips for Preparing Your Word and PDF File for Commercial Printing

Oct, 2019
It’s the most dreaded and feared word in the commercial printing industry…wait for it…wait for it…Microsoft Word! Often in the past, printers would get through the proofing stage and on the press ready to print then bam, there is a pesky font that has somehow not made it correctly onto the sheet. Today printing software systems have made it a much smoother transition from Microsoft Word, or Publisher, to PDF to final output by your book printing company.
The following post will provide tips that will assist you in preparing your next manuscript for print by the experienced professionals at Hill Print Solutions. First, we will start with Microsoft Word then follow with PDF preparation.
Microsoft Word Preparation
Tip 1: Consult with Your Commercial Book Printer
As a standard procedure, contact and consult with your commercial book printing company before initially starting, and throughout, the typing or designing process. This will save you not only time but additional cost.
Discuss the following:
- Ask if the printer accepts Word files. Most commercial printers, including Hill Print Solutions, accepts and prints from PDF files (see instructions on this below.)
- Discuss with the commercial printer about your project’s printing needs, such as paper or book size, paper stock, color model (b/w or full color), binding, etc.
- Notify the printer if your manuscript will include pictures
- Ask if there are any other tips or details that can keep additional costs at a minimum.
Tip 2: Deciding on Your Color Palette
At the early stages or should we say before typing or designing your manuscript, decide if you would like to print your manuscript in full color, black only, or a mix of both. We will only discuss these two options (Full Color & Black) as this is primarily what we accept.
Single Color (Black)
When printing one color (black), all type in your file is printed as a single ink, which is typically black. This is the least costly color method for printing. It is imperative to select in Word the single (100%) color for Black only and not a mixture of colors to create black. Printing devices will interpret a single-color black versus full-color black and you would be subject to full-color prices even though it looks black.
Full Color (CMYK Process)
With CMYK you are printing in full color by combining different percentages of the process-colors Cyan, Magenta, Yellow, and Black, which are most often shortened to CMYK.
Tip 3: Make Sure Your Manuscript Is the Correct Size
Again, prior to creating your manuscript, you need to decide what size you want your finished printed book or publication to be. After you decide, go to the Page Setup box. It is difficult and time consuming to change the page size after beginning the process. Furthermore, your printing company will have trouble printing to a different page size from the file you have already set up.
Important Notes:
- Page size always means the size of the finished page, after finishing.
- Paper size is defined by the size of the paper on which you are printing, before finishing
In most cases, you only need to be concerned with the page size. Most commercial printers have software imposition programs to correctly and easily impose or layout your manuscript for print.
As a rule, you should always set your page size to the final size of your book.
Tip 4: Managing Fonts
Typefaces are designed with various fonts to represent the typeface such as regular, bold, italic, bold-italic, etc. Many typefaces don’t have separate fonts, therefore, Windows will create a synthetic font, for example, slanting a font to create an italic look. Most at-home printers will print synthetic fonts just fine however commercial printers use high-end software rip programs and imposition systems that typically won’t receive or output correctly. It is highly important you know exactly what typefaces you are using. To see what you are using follow these steps:
- Go to the File tab, click Info, and then click Manage Embedded Fonts. The Fonts dialog box shows the typefaces being used within your manuscript.
To See the Various Fonts (Bold, Italic, Etc) of a Particular Typeface:
- Go to the Start menu and click Run
- Within the Run dialog box, Open box, type fonts, and then click OK
- The Fonts window appears and lists all fonts/font variations installed on your device
- Check to see what typefaces you are using and the variations available for you to use
Embedding your fonts
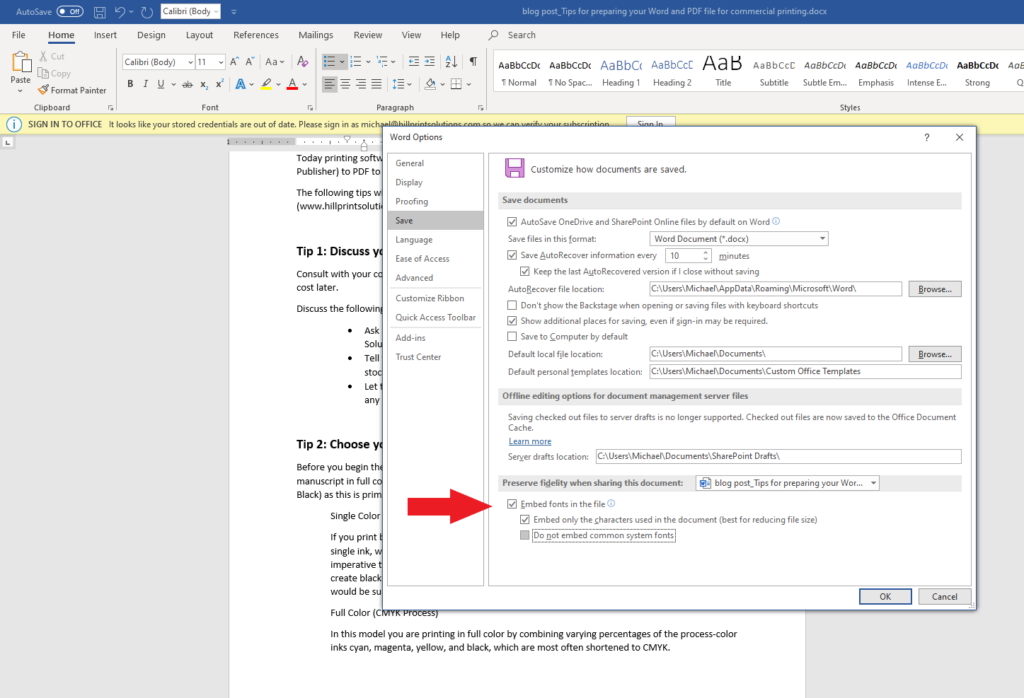
Click File, scroll down to Options and click. In the Options dialog box click the Save button. There at the bottom, you will find a checkbox to select Embed Fonts in File.
Tip 5: Inserting Linked Pictures
If your manuscript has pictures or images, you have two options, either embedding them in the file or insert and linking to the image files. Inserting and linking pictures is the preferred method of reducing your file size and makes it more manageable for your commercial printer to edit colors.
Please be sure to include the linked pictures in your master folder when handing off to the commercial printer.
To Insert a Picture or Image as a Link, Follow These Instructions:
- On the Insert menu, place your arrow pointer to Picture, and then click From File
- Browse to the picture that you want and click.
- Click the drop-down arrow and then click Insert & Link
Converting Your Word File to PDF
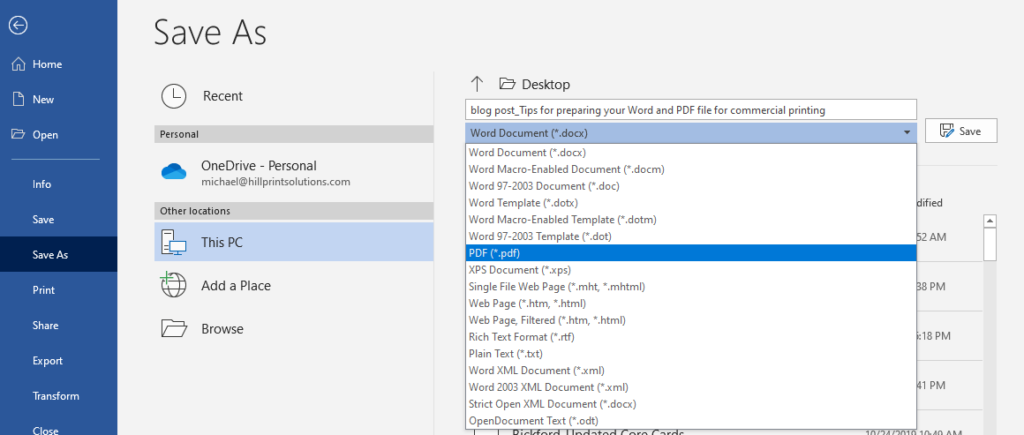
- Click on the File Menu then click Save As
- Click PDF from the drop-down menu
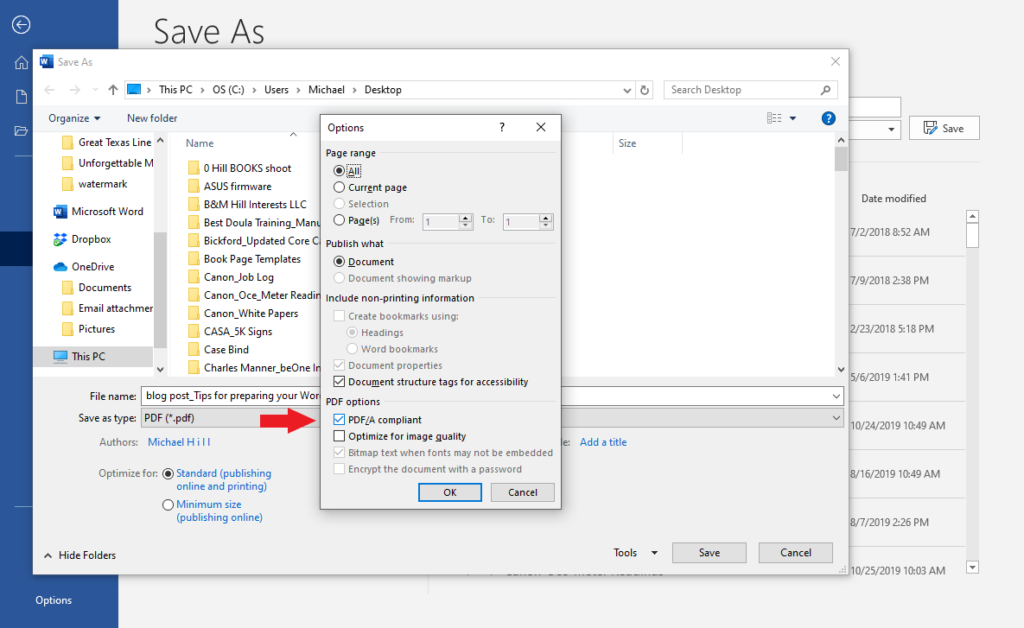
- Select Options and click PDF/A compliant > OK > Save
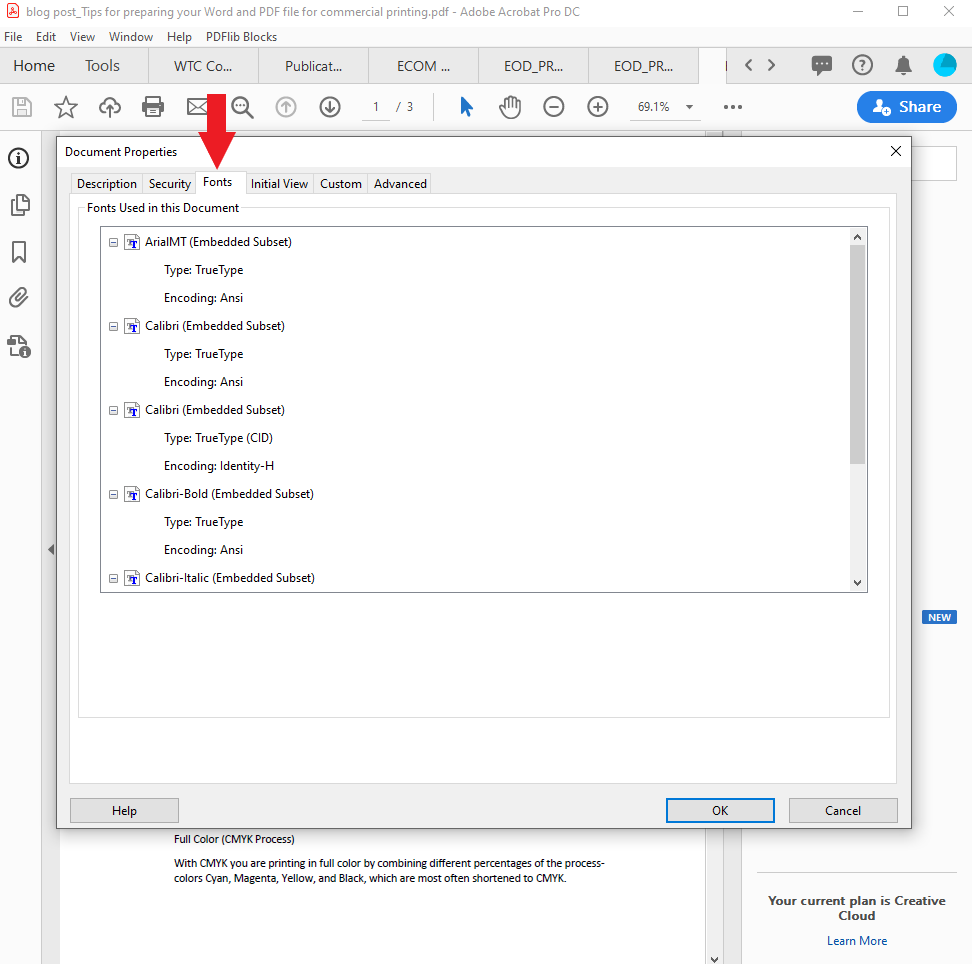
- To confirm your fonts were embedded open the PDF file and click File > Properties
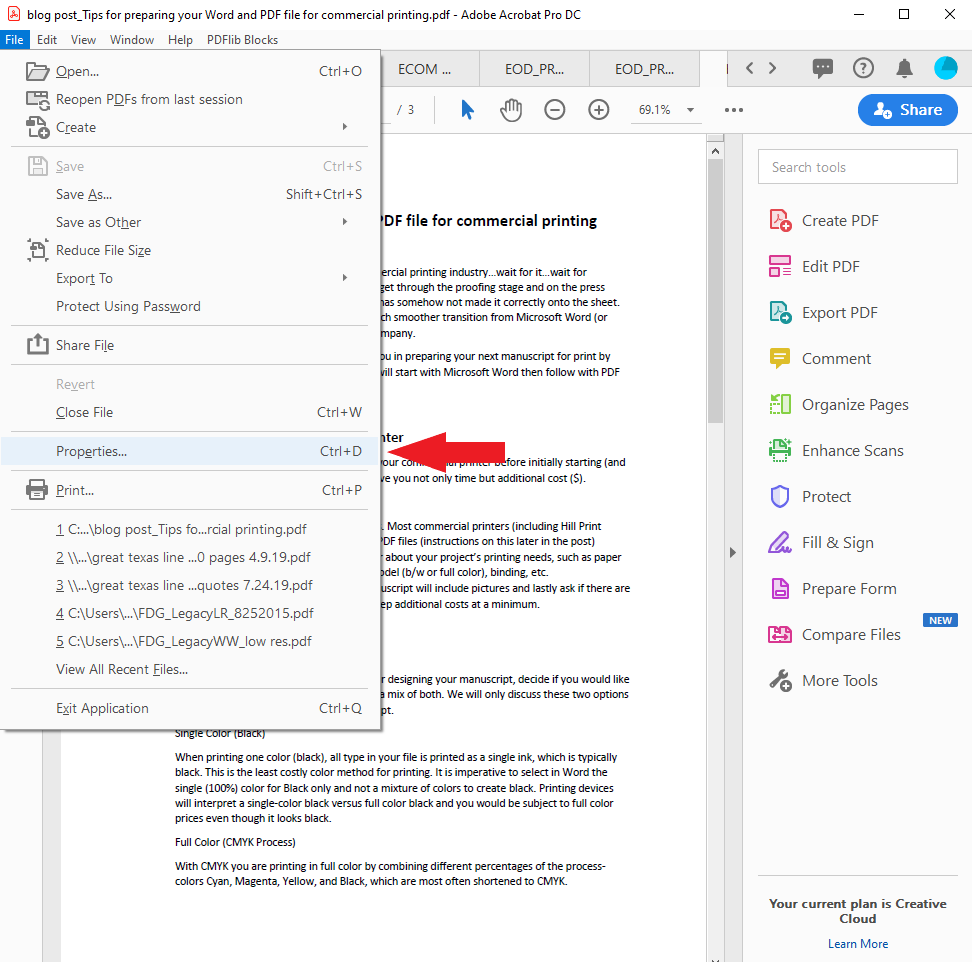
- Click the Fonts tab to verify all your fonts have been embedded
For further tips on preparing your files and to see answers to our frequently asked questions, please visit our FAQ page.
Contact Hill Print Solutions for more print on demand self-publishing tips or get an instant quote online. Our book printing specialists can offer the perfect solution for your printing needs.
